So. Much. Custard: Part 1
Flan
Let me start by saying ... I'm never eating again.
Ok, that's out of the way. Wow, we made a lot of super-rich, delicious, creamy custards today! And then we ate them all. Hence the never eating again.
This week I decided that our R&D day would be all about egg yolks because I have a TON of them. I sell a lot of gluten free bagels, and they take a lot of egg whites so I end up with so, so many yolks. Also, I really love custards - though surprisingly most custards don't take that many yolks, and often only use whole eggs. Also, if you Google "use up egg yolks" or similar, you have to check for cheating recipes that use the yolks and whites separately. For example, Chiffon Cake may use 7 egg yolks, but then it also uses the 7 whites, so in my book that is not a "use up egg yolks" recipe!
So, I picked out three recipes that DO use quite a few egg yolks ... also, here's a tip about custards: you can use more yolks than the recipe calls for and it won't mess up a thing.
A quick perusal of (just as an example) flan recipes will prove this point to you, as they use anywhere from 3 to 6 whole eggs, sometimes adding 2-4 egg yolks to the mix. Thus you can see that, since they all produce basically the same thing, you've got a little leeway in the egg department. Just remember that whole eggs give firmness and yolks give tenderness and richness.
On to the recipes, here's what we used, join in and follow along! Part One: a Perfect Flan that actually was, then, Part Two: a recipe I've been looking at for ages, David Leite's Portuguese custard tars, Pasteis de Nata, and finally Part Three: a recipe from the BBC (sorry, you'll need a scale for this one), Nadiya Hussein's Almond and Sour Cherry Iced Buns. This last recipe we changed the most, but I have to say the buns were absolutely delicious (see "I'm never eating again" at the top of the post!)
Let's start with the simplest recipe, the Flan:
I didn't change a thing in this recipe, except to add some extra egg yolks (maybe two) because I had so many. If you haven't made either caramel or baked custard though, there are some things you should know. First, don't be afraid of caramel, especially this one. It's pretty hard to screw it up (don't walk away) and your window of "good" is very big.
Caramel is made by heating sugar until it melts, or as in the case of this recipe, more easily by boiling sugar with a little water added until it turns - yes, really - caramel colored. This one you can just eyeball. Is it caramel colored? Great, it's done! Here's your basic color progression:
Fun, huh? I could even have let it go a little darker than I did, but I too get cold feet and worry about burning the sugar. I say not to walk away because caramel can be one of those things like nuts where it's not done ... it's not done ... it's not done ... CRUD! It's burned!
The other thing to know about caramel is that it's really, really, hot. And really sticky. Here's a not-fun factoid: did you know that one of the ingredients of Napalm is sugar? Because it sticks to you. Yes, humans can be evil. So, while I adjure you not to be afraid, I also strongly warn you to be respectful. Melted sugar is HOT and STICKY and not in a fun Barry White kind of way.
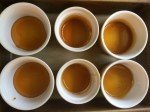
As soon as your caramel is caramel-colored, immediately divide it up between your 6 ramekins which you have ready. HAVE THEM READY! Caramel DOES NOT WAIT. As soon as you've divvied up the caramel, carefully twirl it in the ramekins to coat the sides a little. I didn't rush to do this like I should have (because I was trying to take photos for the blog) and the caramel mostly set in the bottom, but it's not a big deal, it's still going to look and taste great.
This is a recipe with good directions (yay, Epicurious.com!) so just do what they say about the custard. If you don't have a vanilla bean because they now cost you approximately the same amount as the national debt, you can use vanilla extract instead. But if you can swing it I really recommend using the vanilla bean - it does make a difference. Split the bean in half lengthwise and use the back of the knife to scrape out the seeds from each half (kind of like curling that weird curling ribbon), then put the pod and the seeds into the milk/cream mixture.
Two things to know about custard. Which actually are two things to know about eggs: One, eggs don't like sudden and drastic temperature changes. If you dump boiling cream onto beaten eggs or yolks, you will have scrambled eggs! So if your cream/milk mixture is very hot still, whisk is SLOWLY into the egg mixture. Two, eggs have lots of fun proteins that coagulate in the presence of heat, even if you are super careful, so always strain custards and puddings. You'll be surprised how many little eggie boogers you'll be keeping out of your custard. They won't hurt anything, but the Platonic Ideal custard is perfectly smooth - so strain! And strain into a large measuring cup. The recipe says to strain the custard into the ramekins, which is a dumb thing to do. Strain it into something with a spout and then fill the ramekins using that.
This is more schmutz than I usually get - I didn't beat my eggs up as well as I could have. You can also see the brown vanilla bean pod bits.
The other, possibly new, idea for you non-custard makers is the Bain Marie or water bath. Again, don't be afraid, it's really easy and makes your custard SO much better because it acts as an insulator, keeping the custard temperature even and lower than the oven temp (because of the boiling temperature of water, the custards will never get hotter than 212 degrees Fahrenheit, and probably not that hot. Put the ramekins in any baking dish that will hold them with a little wiggle room and fill the baking dish half way up the ramekins with either very hot tap water or boil a saucepan of water on the stove when you make the custard.
GO MAKE FLAN!!!
and then come back for the next installment:
So. Much. Custartd: Part 2
Pasteis de Nata!


